Welcome to my world!

I've developed a passion for cooking since childhood, but in the past six years, that passion has grown into a geeky obsession. I love cooking, baking, and most importantly, sharing the love of food with family and friends. I invite you along on my journey of food discovery and passion.

Sunday, January 1, 2012

Jazzing up home cooking, inspired from "twisted" comfort food

This post isn't as much about a recipe I've made as it is a celebration of turning tradition on its ear.  IceDaddy and I had the opportunity to dine at an amazing restaurant, Rathbun's Blue Plate.  This isn't our first time there, but it was good enough  the first time to have a date night this week and go back. 

Many people unfamiliar with the Dallas restaurant scene may not know how casual you can be when dining on fine cuisine.  Good food does NOT mean pretentious decor, snooty service, or tie/jacket required.  There are places known and celebrated for that level of expectation and service, but I think, especially in a down economy, casual atmosphere with five-star food is a smart twist on tradition.

Comfort food is iconic - almost anyone can name a classic comforting dish from chicken fried steak to collard greens to sushi (hey, if you grew up eating it, that counts as comfort food to you!).  The food is generally hearty, satisfying the soul and the appetite.  While I enjoy tradition, tastes have evolved and chefs draw influences from all over the world.  Blue Plate personifies this style.

What I hope you take from this blog postThe rest of the blog will be devoted to describing the food, and giving suggestions for how to turn tradition on its ear in your home kitchen.  While you may never make lobster and truffle risotto, you just might take a technique and jazz up your own rice dish.

Twist on tradition #1: Scallops with lobster and truffle risotto
Rathbun's Scallops with a Lobster and Truffle Risotto
I confess - I LOVE scallops passionately.  IceDaddy was still jealous from the phenomenal scallop dish I ate in Key West last May, so he attempted to best me by ordering the above entree.  Most everyone has a comfort dish with rice.  Risotto is an Italians' comfort food  rice dish, so it's natural to have it on a menu.  How did they "twist" it?  First, they used a rich lobster stock to cook the rice.  Second, big, buttery chunks of lobster were found mixed in.  Third, they added a lot (A LOT) of butter and cream.  Finally, they mixed in truffle oil, adding an earthy punch.

What lessons can we take from this?
1) Use stock when cooking!  Make your own, buy some, whatever.  It adds a punch of flavor.  That lobster added to the dish?  I bet the chef used the shells to make the stock!  I guarantee you, the next time I make risotto, it's with stock, not just broth.

2) Buy truffle oil.  Unless you're Tony Bourdain and believe it's an abomination, it's an inexpensive way to add some "gourmet" flavor to almost any savory dish.  What is a truffle?  Sparing you the scientific explanation, it's like mushroom flavor on acid.  Super earthy with some funk, restaurants shave delicate slices onto food as a garnish.  Truffle oil may not capture the full essence, but at $5 - $10 a bottle versus $200 a pound, it's an affordable choice.  A small drizzle at the end of cooking or when plating is all you need.

Twist on tradition #2 - Seared duck breast with white beans and greens


Tried duck?  If you haven't it's worth considering.  It's rich like dark meat chicken, but with a spicier flavor.  While I could make duck at home, I usually reserve the treat for eating in a restaurant.  That said, what I loved about this dish are the Asian-inspired flavors of the sauce.  Stewed white beans, toothy and tender, braised greens, tender and flavorful, and this rich brown sauce made with duck jus (read; pan drippings and essence) and star anise. 

What lessons can we take from this?
1) Experiment with proteins.  Like chicken? Try cornish game hens.  Have a hunter friend?  See if you can get doves.  Meat lover?  Try buffalo or venison.  Just changing the protein brings a whole different dimension of flavor

2) Spice it up - try spices that are somewhat unfamiliar.  Buy spice blends from the store or make your own.  Adding Chinese Five Spice powder to chicken breasts changes up the normal sauteed chicken considerably!

And finally, the absolute, "the best I ever ate" menu item that twisted up tradition....

Twist on tradition #3 - Duck confit mac and cheese

Duck fat rules!

OMG is this amazing!  I've heard the gourmet crowd praise french fries cooked in duck fat as one of the best foods you can get, but this mac and cheese elevates duck to another level.  Duck confit is a duck leg cooked slowly in duck fat until it's meltingly tender.  By iteself, it's rich, somewhat gamy, and flavorful.  With the mac and cheese, it adds a flavor dimension combined with the tang of aged cheddar and melt of gruyere.  I thought I might have to fight my sweetie for even one bite.

What lessons can we take from this?
1) Ok, aside from how good this was and that you have to try it for yourself, elevate your mac and cheese.  Add a specially aged cheddar, splurge on gruyere.  Use bacon fat to make the roux for the cheese sauce.  Incorporate flavor everywhere you can. 

2) Make your own pasta.  It's so simple - flour, eggs, salt, oil, and water.  30 minutes - that's it!  Try it and you'll always want fresh pasta.  Sauce clings to it and begs for more!  It makes that everyday dish more special.

I hope these ideas inspire you to think about how you can "twist" your favorite home cooking and comfort foods to make them different.  Happy eating!

Sunday, October 30, 2011

1,001 uses for leftover pasta

After visiting Italy, I am fundamentally convinced pasta is or should be its own food group. You can add just about anything to a pasta and mix it with a million different sauce options - go Asian, Italian, Mexican, or heck - German. Add a protein and vegetable for a complete, possibly one-dish meal.


Courtesy of wikipedia.com
After making all of those lovely lasagna noodles, I was left with a million possibilities to use the plentiful leftovers.  What to do, what to do.... One option was rollatinis - roll up fillings in the noodles and bake in a sauce.  
Courtesy of foodnetwork.com


Another option was to tear the noodles up into "rags" and make a pasta dish. 


Spaghetti Frittata Recipe
Courtesy of EatingWell.com
A third I considered was a spaghetti fritatta - slicing the pasta into thin ribbons and cooking in an omelet base. 

Any and all of them are worthy candidates, and in due time, I will probably try them all.  But today, when I thought of rollatini, it made me think it was too similar to lasagna.  And when I considered fritatta, I didn't want another baked dish, so pasta rags it was!  How simple is that, to quote Ina Garten? 

Tear (or slice) pasta up into random bites and add to whatever protein and sauce.

I had chicken breasts, frozen peas, frozen broccoli, heavy cream, and parmesan handy, so chicken alfredo-esque pasta it was!  No specific recipe, just techniques of food preparation.

I browned the chicken in a little olive oil after seasoning with salt and pepper.  Setting the chicken aside to rest, and using the same skillet, I added about 1/4 cup of chicken broth and broccoli and cooked on medium heat until done.   The broccoli was added to the chicken in the dish and it was sauce time in the skillet! 

By now, I had these wonderful brown bits in the skillet, so I added in about 1/4 cup of white wine and scraped the skillet down.  After boiling off the wine a bit, I added in 1/4 cup of chicken broth and seasoned to taste.  I made a slurry of 1 Tbsp. to 3 Tbsp. of cool chicken broth and added to thicken the sauce.  A splash (about 1/4 cup) of heavy cream, brought to a boil, salt, pepper, and a dash of cayenne, and the sauce was done. 

In about 20 minutes, I had a hearty pasta dish
from leftovers and pantry ingredients! 
Happy eating!

Saturday, October 29, 2011

The Lasagna Debacle, Part II

Hopefully, you've read my love letter to my husband from Part I of the post.  If so, you know that we have a lasagna recipe that continues to bind us together with memories and cheese.  Since our tastes have evolved and I really try and make more things completely from scratch, I was inspired to make as many components myself, including the ricotta cheese.  Ambitious? Yes.  Crazy?  Possibly.  Committed?  You bet!
Lasagna is a great dish because you can make it partially or competely ahead of time.  Last weekend, due to some scheduling limitations, I planned to make the lasagna over two days.  Because I've never undertaken quite this elaborate amount of pre-prep work for a one-dish wonder, I journaled the experience.

The ingredients of ricotta
Day 1 - Got all of the ricotta-making ingredients laid out, along with my trusty copy of The Cheese Lovers Cookbook by Paula Lambert (for those in the Dallas area, check out her store, Mozzarella Company, in Deep Ellum.  They supply a who's who of Dallas restaurants) and a back-up recipe I googled for a second opinion that is anonymous, how can I fail?  Oh wait, I recall now from the class IceDaddy and I took on cheese making that raw milk is best.  Since the Wisconsin family farm is about 2,000 miles away, no such luck on the raw milk (illegal to buy).  Will have to make do with what the grocery store offers.  I remember something Paula said about pasteurized versus ultra-pasteurized and how the ultra won't curdle.  Praying they did not mislabel the milk at the store.

The epic fail - not many curds
I put the milk into a pan, sprinkle on salt, then the lemon juice in circles to hopefully curdle the milk.  Seems to have a little curdling going on... could be a good sign.  Milk is about to boil - remove it from the heat and WAIT!  15 minutes later and we have... milk, with a few curds.  Hmmm... recipe says lemons may not be acidic enough, so adding a couple tablespoons more lemon juice.  WAIT MORE... and, pretty much no curds.  Ok, $3.00 of milk down the drain there.  Must go back to store and hopefully find pasteurized milk. 


Success
Back from store!  Juice the lemons, repeat above process, and... WAIT.  Ok - WE HAVE CURDS!! 
More liquid than curd
Happily draining ricotta... to find that there aren't a ton of curds.  $3.00 of milk (1/2 gallon) and $2.00 of lemons to make... maybe 1/2 cup of ricotta!?  That's pretty pricey ricotta.  Add to that the $3.00 from the ruined batch and the lasagna has cost $8.50 from the ricotta alone.  It only took me 3 hours and $8.50.... Oh, and I have that back-up container of ricotta in case there isn't enough... which there isn't.  Grrrrrr... on to the meat sauce.


Mushroomy good!
Mushrooms & meat
Day 1 3/4 - Hopefully, I'll have better success with the meat sauce.  Browned ground beef - check.  Decided to make sauteed mushrooms to add some flavor and texture - check.  Love adding sherry to the mushrooms for additional dimension.  Wonder if I'll even taste the sherry when the lasagna is cooked.  Added mushrooms to meat and let sit while I make the tomato sauce.

Cost tally: $3.50 for the beef, $2.00 for mushrooms

Day almost 2  - Over 4 hours into cooking and still have at least about 1 - 2 hours since the sauce has to simmer.  This tomato sauce promises to be good - borrowed liberally from a Nancy Silverton recipe in Bon Appetit.  Chopped carrots - baby carrots were flying everywhere!  Had to buy those because I know I can use the rest up another day to make my maple-glazed carrots (really good recipe too).  Diced up celery and really cut the amount because we are not celery people.  Added the monstrous cans of San Marzano tomatoes (there's another $5.00 for tomatoes alone!).  Combined sauce with mushroom/meat mixture and called it a day!  Total dollar tally for the day's lasagna making- $20 (if you count the carrots and celery at about $1.00)

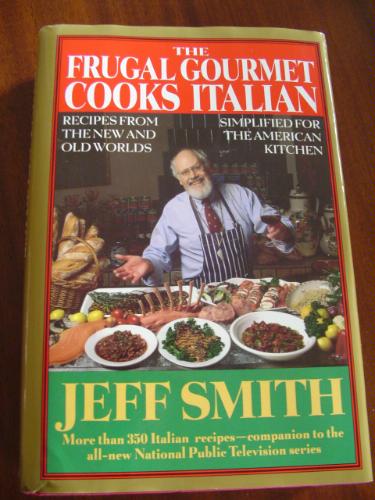
Day 2 - Pasta day!  I found a $20 pasta roller at TJ Maxx, so I'm ready to roll out lasagna noodles.  (That does not count toward the total since I've owned it since this summer).  I go to the best pasta recipe I've found, oddly enough from The Frugal Gourmet Cooks Italian which would not seem like the most authentic Italian food tome, but Maria Guarnaschelli was the editor, so it meets with her exacting standards.  (Her daughter, Alex, is the resident mean judge on "Chopped").  Why is this the best?  Because it involves adding actual semolina flour and not just all-purpose.  Makes it seem more authentic to me and has better texture (more nubby to pick up sauce).
Happy cooked noodles
Dried and ready
 Phew! This actual rolling out the lasagna takes some muscles.  Glad I'm back at Koko FitClub again or I'd need to rest halfway through!  Laid out the sheets by the pot of boiling water and then went all Giada in the trick for cooking and getting the noodles to not stick together - brushed them with olive oil and laid them on a sheet pan!  Brilliant! 

Cost of noodles - about $0.50 total for the flour and minor amount of good olive oil and good salt.  Cheap chic!
Day 2 1/2 - This was a MUCH easier day today.  Ready to assemble the lasagna after only about 2 hours of work (noodles have to cook in batches about 3 minutes each - takes time).  Layer, layer, layer it up!  I splurged on real shredded parmesan, not the stuff from a can.  A little pricey ($3.00 for 3 oz), but worth it!  Oh, and mozzarella is in there too, but I stuck with traditional shredded, not fresh.  Different textures - $2.50 for the mozzarella (on sale).
7:30 pm - Lasagna is DONE baking.  I threw in some garlic bread to toast the last 15 minutes of cooking and we are ready to eat.  After spending about 8 hours (not all the time was actively cooking) prepping, and WAITING, we are ready to eat!  Total cost: $26!  That's probably a little higher than I would want to spend to make a simple pan of lasagna, but it was memorable and I'm glad I tried it! 

How was the taste?  Well, the ricotta has a lemony freshness and is pillowy soft, not like the grainy texture of store bought... when you taste it by itself.  In the lasagna, it wasn't distinguishable from the store bought.  The mushrooms had a nice flavor and meaty texture (baby bellas are the best), but couldn't really taste anything special from the preparation with the sherry once in the lasagna.  Tomato sauce did taste different than store bought, even in the lasagna.  Had a nice freshness and the carrot added a great sweetness and dimension.  Noodles were different - they had more flavor. 
Yummy yummy $26 in the tummy!
Overall, there are things I WILL do next time I make "Date Lasagna" from my experiment - I probably will make my own noodles and add mushrooms.  I might even make a homemade tomato sauce, especially since you can make that ahead and freeze it.  Each of those components add something special to the dish.  Plus, the noodles made leftovers I turned into a pasta dish the next day.  Loved that option! Everything else?  Less likely.  That said, it was a delicious experiment.
Happy eating!

Friday, October 28, 2011

The Lasagna Debacle, Part I

Lasagna, at it's soul, is a simple dish - meat, cheese, sauce, and noodles are its fundamental components.  Yet, there are endless ways of complicating (and simplifying) this wonderful dish.  There is something comforting about the familiar Italian flavors and hearty, substantial personality.  There are 1 billion variations on a classic and countless reasons for them.  In a fit of nostalgia following, I recount the only date meal my husband ever learned to make to impress girls (it impressed me).  Next blog post, I "gourmet" up our tried-and-true (and easy) recipe for something more "artisinal" and completely from scratch.  The debacle?  Does 100% "from scratch" lasagna taste better than the lasagna with pre-made ingredients (i.e. spaghetti sauce, store-bought ricotta, pre-made noodles)?  Results to come in Part II!

My sweetie does not cook much.  He grills great, but never really learned to cook things on the stove.  Maybe I need to challenge him to cook on the grill... hmmm. :)  Since it is rare for him to don the chef's hat for the day, it was very memorable to me when he made me the one-and-only "date" meal he knew - lasagna and garlic bread.  Why did he know how to cook lasagna and nothing else?  I can thank the J.J. Pearce High School College Survival class!  His teacher, far wiser than her students, knew that a guy would eventually want or have to impress his sweetie with a nice home cooked meal.  So, she gave them a reliable lasagna recipe and instructed them to use it!

Over the years, the "Date Lasagna" has morphed from something IceDaddy made for me to something we made together, and, most recently, to something I make for us.  How did this happen????

What I love about the receipe is the simplicity and easy-to-assemble ingredients.  Nothing complicated and aside from a one hour plus cooking time and three basic assembly steps (cook meat and combine with spaghetti sauce, mix ricotta with eggs, and assemble the lasagna), it's pretty easy. 

It's almost like a non-recipe, which is why it's stayed a family favorite.  I can assemble it from memory.

"Date Lasagna"
Serves 6 - 8; inspired from a recipe courtesy of JJ Pearce H.S. Home Ec
1 lb. ground beef, cooked and drained
1 jar spaghetti sauce
1 cup water
1 - 15 oz container ricotta cheese (regular or part skim)
2 eggs
2 tsp.. dried parsley
Salt and pepper
1 box no-boil lasagna noodles
1/2 lb shredded mozzarella
3 Tbsp. grated parmesan cheese

Combine cooked ground beef, spaghetti sauce, and water.  Mix to combine and season with salt and pepper.  Set aside.  Combine ricotta, eggs, parsley, and about 1/4 tsp. each salt and pepper.  Mix to combine and set aside. 

Preheat oven to 350 degrees.  Spray 9x13 pan with non-stick spray.  Spread about 1/2 cup of meat sauce on bottom of pan.  Place about 5 lasagna noodles (uncooked), edges overlapping in pan.  Cover with 1/2 of the ricotta mixture; spread over noodles.  Top with 1/2 of the mozzarella and 1 Tbsp. of the parmesan, finishing with 1/2 of the remaining meat sauce.  Repeat the layering through the meat sauce.  Top with remaining parmesan cheese.

Cover pan with aluminum foil and bake at 350 degrees for 1 hour.  Uncover and bake 15 - 30 minutes longer.


Yummy tomatoey goodness
I hope you consider making this for your sweetie.  It's also a great dish to assemble as a family.  Happy eating!

Thursday, October 27, 2011

Pot Pie Please!

The weather shifted ever-so-slightly to cooler evenings and still-pleasant days.  Though trees don't all change colors here, fall is in the air.  The start of fall has me craving nourishing, hearty soups and, of all things, pot pie! 
Now, I am not a fan of store-bought pot pies.  They are so salty and fat-laden, plus there tends to be a killer amount of peas, one food I can usually skip entirely.  I've come to like peas again over the years... but just a little, so pot pie can go either way for me.  One of the few I did like growing up is the Swanson Chicken Pot Pie.  My mom would buy it in mass quantities at Sam's Club and voila! dinner.

Happily, when the craving hit this week, I had a recipe in mind.  Real Simple, bless their simple cooking heart, offered up a mushroom pot pie with a puff pastry topping.  As I think puff pastry can be its own food group, I was intrigued.  The recipe calls for pretty standard pot pie ingredients - carrots, celery, and onions (called a mirepoix if you want to get fancy) and mushrooms (white or baby portabella), plus the rich and tasty puff pastry.  It's a great base that could be modified to different tastes, which is what I did. 

I liked the basic recipe, but I was inspired to try and improve it with a few "secret" ingredients. 

Puff Pastry Shells  - These are fantastic to make appetizers, but for my purposes, I thought it would be great to make individual pot pies like those that we grew up eating, but tastier.  If you're cooking for only one or two people, this is a great way to make just what you plan to eat and freeze the rest. (NOTE: I receive no compensation from Pepperidge Farm, but they make a great product)

Tio Pepe FinoSherry or wine - Any time I cook with mushrooms, I think it really adds something to the flavor with  just a splash of wine.  I know there is science behind it, but bottom line is that the French really are onto something cooking with wine!  Want to learn more about sherry?  Go here:  http://wine.about.com/od/winebasic1/a/SherryWine.htm

Any liquor store will carry sherry, but PLEASE do NOT buy "cooking sherry."  It's disgusting and salty.  If you don't want to buy sherry, use whatever wine you drink and add in a few tablespoons to the mix.


Italian parsley - Parsley punches up the flavor with a mild herbiness and freshness. I cannot think of a savory recipe that doesn't taste better without parsley.


Gold medal <em>wondra flour</em>, 13.5 ozWondra Flour - We all usually keep flour in our pantries, but if you're looking to create the smoothest sauces and avoid the typical clumping with all-purpose flour, consider buying a canister of Wondra.  It's very finely ground flour that is made for sauces.  It made the gravy in the pot pie super smooth and luscious (without ANY butter or cream!).

With my "secret" ingredients at hand, I began to cook.  Thank you to Real Simple for the basic ideas in the recipe; I took their inspiration and made it my own.  Here is my new favorite (and versatile) pot pie recipe. Don't be deterred by the long list of ingredients.  The vegetables are necessary to form the flavor you know and love for pot pie and you can omit the parsley, sherry/wine, and green onions and it will still be good.   I've given ideas at the end of the recipe for different add-ins to fit your taste.  Don't like an ingredient?  Leave it out!

Heather's Homemade Pot Pie
Serves 4, about 1 hour cooking time total (including baking)

2 Tbsp. olive or canola oil
1 1/2 pounds mushrooms (such as white or baby bella), sliced, halved, or quartered
3 carrots or 10 baby carrots, cut into 1/4-inch pieces
1 celery stalk, cut into 4 strips and chopped into 1/4-inch pieces
1 medium onion, diced
2 green onions, sliced small
1/2 tsp. dried thyme
Salt and pepper
1/3 cup Wondra or all-purpose flour
1 1/2 cups vegetable or chicken broth (low sodium preferred)
1/2 - 1 cup frozen petite peas
1/4 cup Italian parsley, finely chopped
2 Tbsp. dry sherry or white wine
1 sheet puff pastry (1/2 package), thawed, OR 4 puff pastry shells (pictured above)

Preheat oven to 400 degrees F.  Heat the oil in a large skillet over medium-high heat.  Add the carrots, celery, onion, green onion, thyme, 1/2 teaspoon salt, and 1/4 teaspoon pepper.  Cook until vegetables soften, about 3 - 5 minutes.  Add in the mushrooms and cook, stirring occasionally, until the vegetables are tender, about 12 - 15 minutes total.  Sprinkle the flour over the vegetable mixture and cook, stirring, for 30 seconds.  (It will look very dry).  Add the broth slowly, stirring to incorporate the flour.  Add the peas, parsley, and sherry.  Bring to a bubble.

Remove from heat and transfer the mixture to an 8-inch square baking dish.  If using the puff pastry sheet, lay the pastry on top and cut several vents.  Alternatively, place the 4 puff pastry shells on the mushroom mixture.  To make individual pot pies, divide the mixture into 4 oven-safe bowls and place one puff pastry shell on each.  Place the baking dish(es) on a rimmed baking sheet and bake in the oven until the crust is golden, 25 - 30 minutes.  Let rest a few minutes before serving.

Additional variations/add ins:
- Add 1 cup of shredded or chopped cooked chicken or turkey
-  Add 1 cup of pre-cooked potato
- Add 1 cup of pre-cooked chopped green beans

Get inspired to create your own twists on a classic and you will think of endless variations!

Tuesday, October 18, 2011

Still Time for Ice Cream?

Yes, we are technically in the realm of fall throughout the country.  Down here in Texas, the seasons are not very well defined.  In San Antonio, I can still recall sunbathing in December and wearing shorts on Christmas some years.  That means we have lots of time each year to enjoy ice cream.

As far as I'm concerned, dairy is a little bit of heaven.  As a Wisconsinite and a person whose extended family includes about 100 dairy cows, I am a believer in all things milk, cheese, and ice cream.  When IceDaddy and I found the heaven that is Italy and, more specifically, the amazing gelato, we were inspired to buy an ice cream maker. 

I can't say that it churns out restaurant-quality ice cream (too many ice crystals), but I can control what goes into every batch much more and I'm willing to sacrifice some mouth feel for flavor.  In that vein, when I came across a recipe for banana ice cream, I was completely intrigued.  First off, it was NOT the heaviest or least healthy ice cream recipe I've seen

(thank you to Ina Garten for that one - but oh-so-good chocolate gelato recipe), and it was versatile.

With Ice's birthday just past, I wanted to make him a special meal, including something for dessert.  Rather than going for the usual banana puddin' cake (which is AWESOME - thanks Cake Mix Doctor), with 100+ degree temps still a possibility, ice cream logically won.  And hey, if the ice cream was good, it might find its way into a banana puddin' ice cream cake at some point....

In my humble ice cream making experience, here are some hints to consider:
- ice cream is usually just a "custard" base; that is, milk, eggs, and sugar
- sweetened condensed milk is a great product to thicken the ice cream without having to add eggs (pasteurized egg product is an option if not cooking the custard before freezing); if you're averse to uncooked ice cream, this may be a good option.  It does add a distinct flavor though
- vanilla, vanilla, vanilla - just about any ice cream benefits from a splash of vanilla
- some recipes call for cooked custard, while others do not.  If you do cook the base, make sure to cool it down in an ice bath before putting into the ice cream freezer.  Better texture of the final product that way

So, with that, I took myself over to my 'hoss blender and threw in a cup of 1/2 and 1/2, 3 very ripe bananas, a couple tablespoons of sugar, and 3/4 cup of sweetened condensed milk.  That was the entire recipe given to me.  I chose to "embellish" with a little pinch of nutmeg and, ahem, vanilla (what else!).  The bananas can vary in sweetness depending on the level of ripeness, so you may need to add more sugar to taste.  This got served with a yummy and sweet chocolate sauce, so the lack of sweetness of the ice cream was a terrific balance to the overly sweet chocolate.

Now, when you eat a bite of sweet, creamy perfection, whether fall, winter, spring, or summer, is there really any time NOT appropriate for ice cream?

Magazine Management - recipe organizing

I talked in a prior post about figuring out how many recipes I can clip in a month and finding a way to manage them and not just keep accumulating piles of recipes. 

http://www.target.com/   At my local Tar-jay (aka Target) , I browsed the school supplies aisle and came across an accordion folder that fits my criteria - enough space to fit a month's worth of recipes, organize the ones to try by month, and have extra space at the back for the recipes I've tried and have to "evaluate."  Sound complicated?  Not really.  Here's a picture of the organizer:

Best $5 way to organize recipes
For about 5 bucks, I now have an organizer that takes up 1/2 inch of space on my shelf, lets me sort recipes by the season and month in which to try them, and store the ones I tried at the back.  So here's how I'm doing so far:

Month 1/2 - Clipping crazy
I manage to clip recipes from five different magazines (yes, I think there should be a support group), and because my cookbooks and recipes are threatening to take over the pantry shelves, I have to do something.  At the end of September/beginning of October, I've perused the magazines and clipped out the recipes I want.  I throw the recipes into the "October" tab after grabbing ones I want to make for the week.

I wrote in my last post about a complicated formula for figuring out the number of recipes I can clip.  Before I sorted them into the folder, I divided them into categories - lunches, breakfasts, dinners, and miscellaneous.  I counted them since I'm not making 30 dinners in 30 days - a girl's gotta have a night out sometime - and since I came in at a realistic number of recipes, I paper clipped them in categorized bundles.

I pulled out recipes for the week, cooked them, and filed the ones I made and considered worthy of considering keeping.  End of the month, I can review the recipes and my notes to figure out what goes in my permanent collection.  Now that's another whole series! :)

Back to cooking!  Coming up next... homemade lasagna with from scratch pasta, ricotta, and tomato sauce!